 |
||

Overview
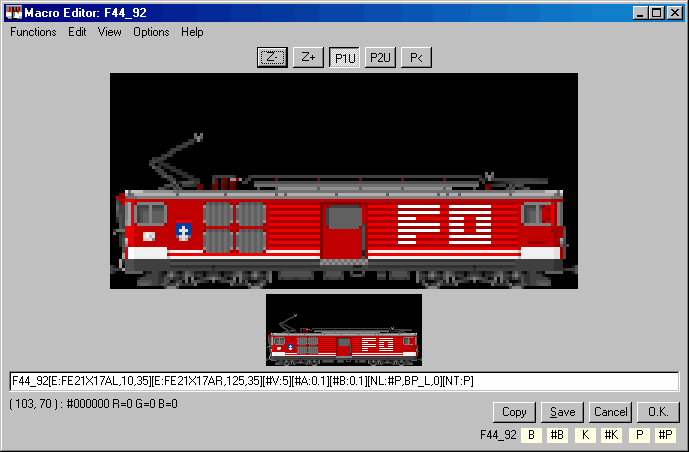
The Graphic Testpad/Macro Editor allows one to test macros or modifications in a graphic environment in the screensaver program.\\
The basic difference between the otherwise rather similar programs is:
- In the Graphic Testpad one can input macros for pictures, test them and modify them. However, they cannot be saved. When you close the Graphic Testpad, and reopen it, only the vehicle's normal Stock List entry will appear in the command line.
- The Macro Editor functions the same but allows one to save the changes that one makes to the macros attached to a vehicle in the Stock List. When the program is opened, the entire macro will appear in the command line.

The program window is split into the following areas for which descriptions are available in the subsequent chapters:
- The typical Windows Menu Items,
- a series of Control Buttons, which are dependent on the contents of the command line,
- a zoomable Picture Area in a scale somewhere between 1:1 and 1:10,
- a reference thumbnail picture of the picture in its original size,
- the Command Line for macros or modifications,
- a second bank of Control Buttons
- and an area of Drag & Drop Fields for ease in creating macros.
The Graphic Testpad offers the following features:
- The vehicle is shown in both its original size (bottom) as well as a zoomable size (top) simultaneously. The zoom can be set at various levels of magnification from 1:1 up to 1:10 so that modifications to the picture can be examined as they are applied. Both depictions of the vehicle immediately reflect any changes made in the command line.
- Multi-phasic vehicles can be shown in motion or also in a mode that shows all of their individual phases separately. Since an animated vehicle is composed of multiple individual pictures, it is useful to be able to view them both in sequence as well as in motion to see how the phases interact. These views can be seen simultaneously in 1:1 as well as zoomed mode.
- Depictions of the vehicle that depend on the direction the vehicle travels in can be inspected and shown both in normal and zoomed mode. Pressing on the '<' button causes the vehicle to be displayed as if it were travelling left. Conversely, pressing the '>' button makes the vehicle appear as it would if travelling right.
- If there are buttons labelled
P1U, P2U, P3U, P4Uone can use these to control the movements of any pantographs that the vehicle possesses. When one presses on the button it calls the[E: ...]or[A: PAN, ...]macro and its defined movement of the pantograph. The depiction of pantographs using SAR files only allows two pantographs to be controlled. So some vehicles imported from other programs may not contain animations for all pantographs on the vehicle at hand. - Any vehicles with a button labelled
DOORcan have the open and close functions of the doors tested. - The zoomed view of the vehicle can be quite useful to check the colour(s) of the vehicle when writing macros that affect the vehicle colour.
- The right mouse button calls a context menu when clicked over the zoomed view of the vehicle. This can be used to open help files for Modification Commands.
 Overview
 The Configuration Window
 Configuration Window Menu Bar
 Program Window
 Stock List
 Stock List Menu Bar
 Shortcut Keys
 Author's database
 Description Editor
 Graphic Testpad
 Graphic Testpad Menu Bar
 Timetable Editor
 Timetable Syntax and Semanics
 The timetable header
 Sections, Groups, Lines, Scenes
 Actions
 Stock List File
 Stok List File Keywords
